
Aero-Sharp Software - Inverter Monitoring (web-based) - HR-INV-X01 PVMonitor2008
 Having recently (2012) acquired an Aero-Sharp inverter as an addition to my existing solar PV setup, I was naturally inclined to devise a method of monitoring it easily. My solar control centre and battery bank is set up in the basement, co-located with my servers. My existing charge controller (for the stand-alone DC power system) is monitored remotely via my server, which is running Windows Server 2003.
As it is inconvenient to keep going down to the basement to view the status of the Aero-sharp, I wanted to connect it up to the computer for remote web-based viewing.
Existing Com port capabilities
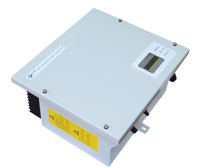
Aero-sharp inverters have, as standard, built-in serial communication capabilities. However, most models are shipped without any additional cables or external connection sockets. These are optional extras.
To monitor the inverter on a computer running Windows, an RS485 adapter and Aero-Sharp's own PVMonitor2008 software is required. However, whilst the adapters are easy to obtain, PVMonitor2008 was never released as a downloadable package and is difficult to obtain. By now, most dealers and solar system installers have abandoned Aero-sharp in favour of other models, and it is near impossible to find an outlet that still sells the monitoring kit.
Fortunately, it is easy to retrofit a socket to the HR-INV-X01 series using off-the-shelf components to allow connection to a computer.
Thanks to the efforts of the hacker community, it is also possible to use homebrew or third-party software to monitor the inverter's status.
DIY web-based HR-INV-X01 monitoring on Windows XP or Server 2003
Articles elsewhere on the internet provide instruction on how to monitor the inverter using Linux. So far, no Windows and/or web-based alternatives are available. So this article was written.
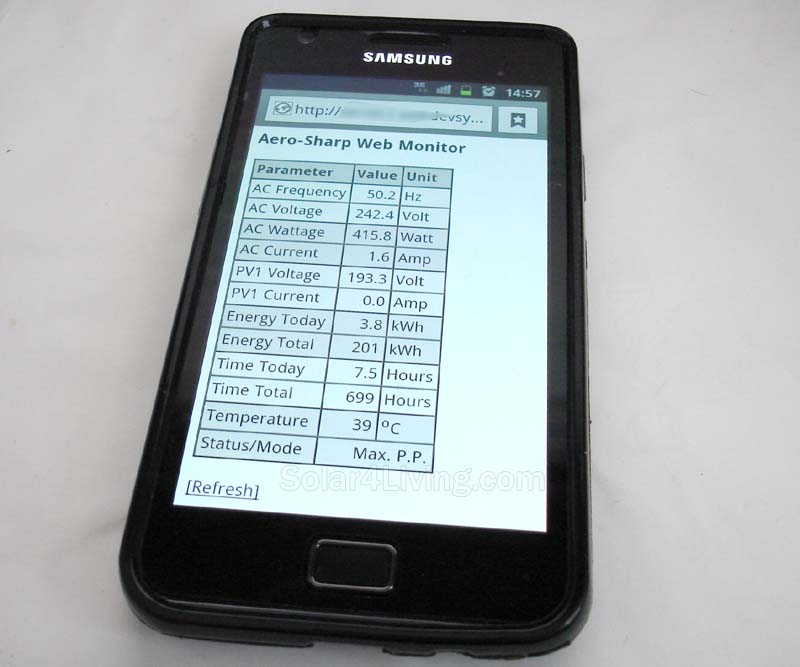
This article describes how to set up your own computer-based monitoring software, without the need for PVmonitor2008. It allows you to view the inverter's status remotely, even over the internet. For example, whilst away from home, you can see how many watts your inverter is outputting by viewing a web page on your smartphone.
The PHP script is based upon Ozzicomp's C program, which only runs on Linux. There were plans to port it to Windows, but to date, nothing has been released yet.
Disclaimer
This procedure involves opening your inverter. This could potentially expose hazardous voltages. It will also void your warranties. Check with your supplier or installer before continuing.
Only experienced electricians and/or electronic technicians should attempt these procedures. if you are unsure, ask someone who does have experience. If you can't find someone who can help, do not continue!
All changes and modifications performed on your equipment are done so at your own risk. The author of this article takes no responsibility for loss or damages arising from the changes or modifications you make.
Requirements:
- A computer with an RS232 port, running Windows XP or Server 2003
- RS485 to RS232 converter
- Twisted-pair cable (eg. Cat5)
- Web server (IIS6 or Apache)
- A working PHP 5 installation
- Serproxy (a TCP terminal emulator proxy for com port access)
- 2 or 3-pin IP67 locking connectors (plug and socket)
- Pluggable 2-way 3.81mm terminal block with screw-on wire connection
Note: the PHP scripts have only been tested on a 32-bit system. It has not been tested on 64-bit systems or older/newer versions of Windows. Your results may vary.
|
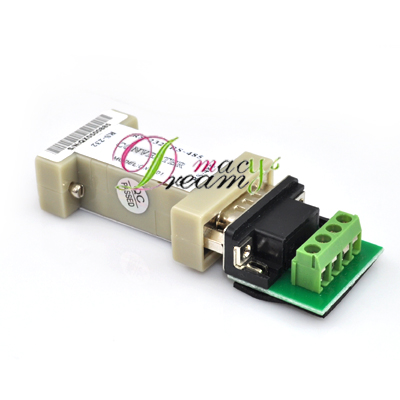
1. Buy the RS485 converter. These are readily available from ebay. If your computer or server has a serial port, the RS232 type is recommended. Otherwise you can buy a USB version. The PHP script and serproxy has not been tested with a USB adapter. Your results may vary if a USB adapter is used. Please let us know if you have success with a USB adapter. |
 |
|
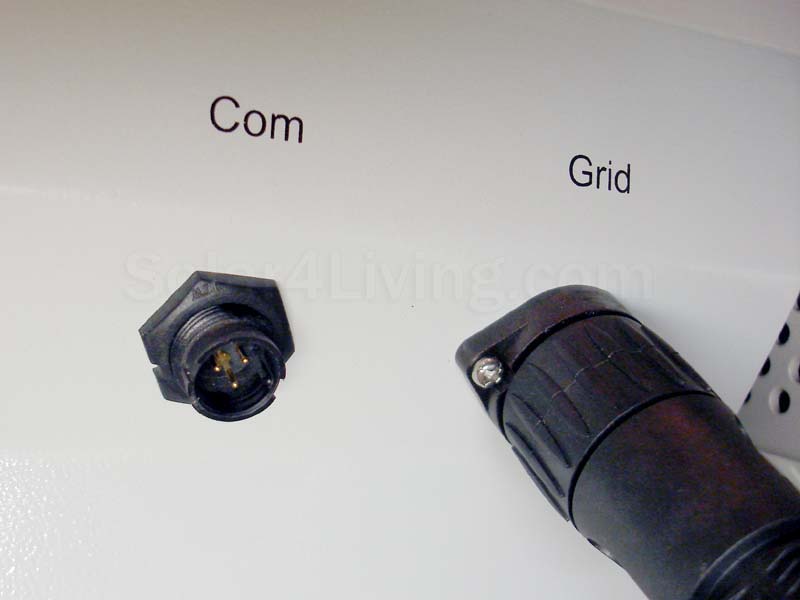
2. Buy the connectors and cable For the internal connection to the inverter's LCD board, I used Altronics' P2652, a 2-way pluggable terminal block. This terminal block is almost an exact fit to the socket on the LCD board. For the external connection, I used Altronics' P9463, an IP67 3-Pin 5-amp Chassis locking socket. For the plug, the corresponding 3-pin P9483 was used (image shows the 5-pin version). 2 or 3 pin? The reason why the 3-pin version was chosen is because the RS485 standard includes provision for a shield (ground) to prevent interference. If needed, replace the unshielded pair with a shielded twisted pair cable, and connect the third pin to the shield. The third pin on the inverter socket should be internally connected to the chassis. If earthing is done, don't do it on the computer end. Shielded balanced / twisted pair connections should only earthed at one end. For most domestic installations, a 2-pin unshielded connection should suffice.
|
Note: if your inverter already has a socket fitted, do not purchase the plug and socket pictured. Instead, you need to purchase a Buccaneer 400 Series 3-pin plug, part number PX0410/03P/4045 (green with 4.5mm cable entry) or PX0410/03P/5560 (Blue with 6.0mm cable entry). Then skip to step 4. |
|
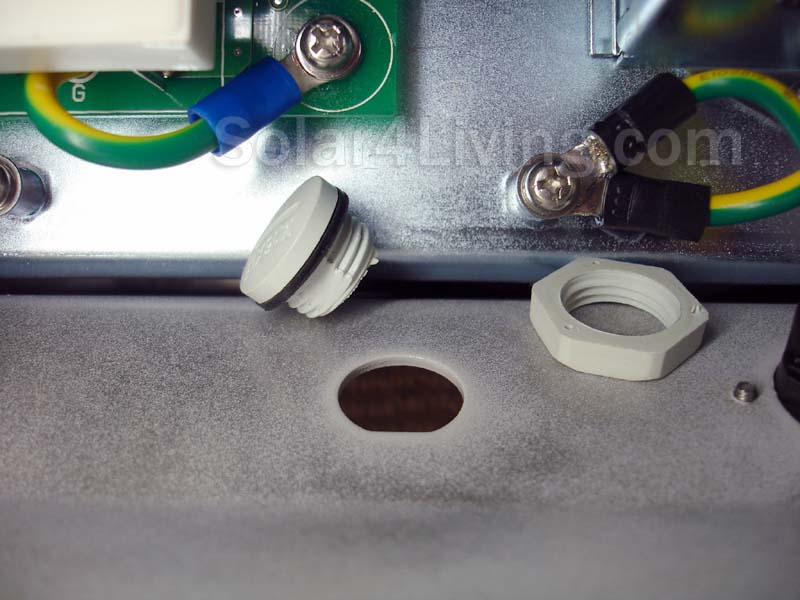
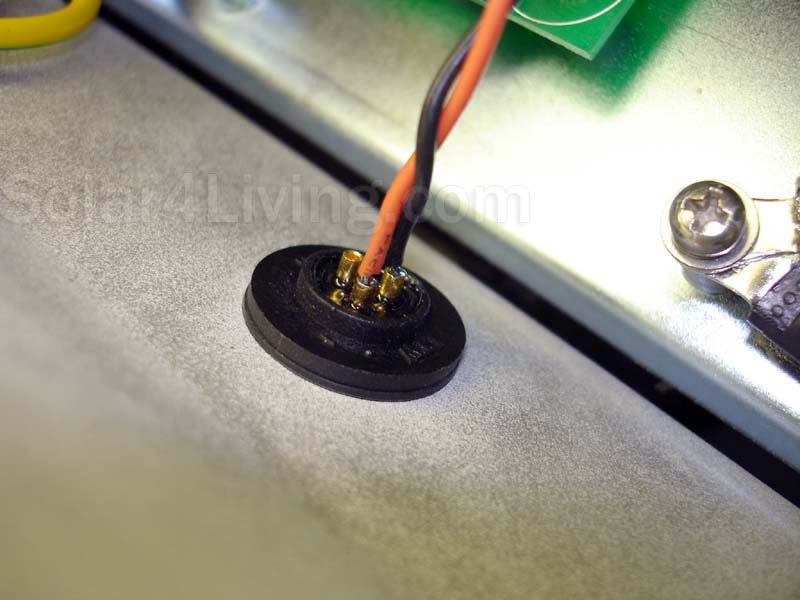
3. Make the connections inside the inverter Unplug power. Remove all power (PV and Mains) connections to the inverter. Wait several minutes for the PV capacitors to discharge. Open Inverter lid. Open the lid of the inverter by unscrewing the 4 bolts using hex screwdriver bits. Carefully lift the lid. It may be stuck tight due to the airtight foam seal - just pry it carefully and eventually the lid will pop open. There is a ribbon cable and earth wire connected to the bottom of the lid - don't open the lid too quickly or you may snap/break the cables. You may disconnect these cables to make the next few steps easier. Remove the bung. Note that even though the bung has a slot for a flat-blade screwdriver, DO NOT attempt to remove it this way. It is inserted into a keyed hole and you will not be able to unscrew it from the front. Instead, you need to unscrew the retaining nut from the inside. Make the internal cable. Make a short 20 or 30cm piece of twisted pair wire. Strip one end and attach it to the 2-way terminal block. Solder the other end to Pins 1 and 2 of the IP67 socket. Take note of polarity; pin 1 on the socket should be T+/R+ and pin 2 should be T-/R-. Attach the connectors. Once the internal cable is completed, screw the IP67 connector to the chassis, connect the terminal block to the LCD board (JP405). Close the inverter lid. After double-clecking your connections, carefully close the inverter, ensuring none of the RS485 wires get pinched under the lip of the enclosure and lid. If you disconnected the ribbon cable from the LCD board and earth wire from the lid, remember to re-connect them first! |
         |
|
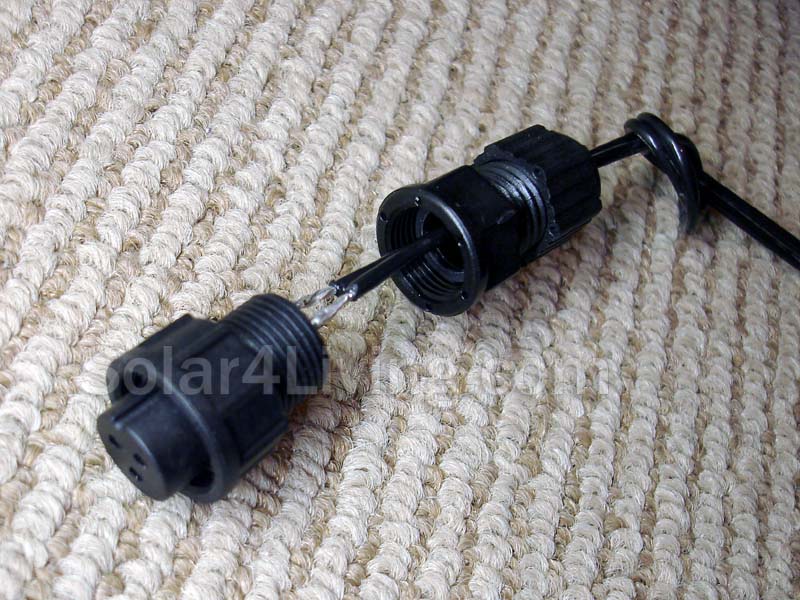
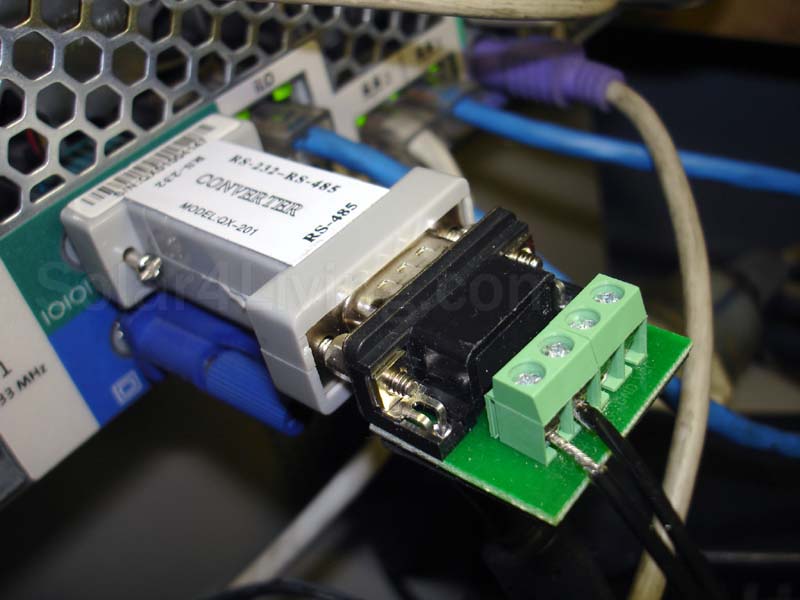
4. Make the connection to the computer Use a twisted pair cable. Cat5 is readily available and cheap for this purpose - just use one of the 4 twisted pairs. The RS485 specification allows for a distance of up to 1.2km, so if your computer is located more than the length of a box of cat5 (usually 305m), the wires can be joined. On one end, strip one pair of wires and solder them to the back of the plug. If a 3-pin plug is being used, solder the wires to pin 1 and 2. Then assemble the cable glands. On the other end, strip the corresponding pair and terminate them onto the terminal block supplied with the RS485 converter. Use only the T/R+ and T/R- terminals. Ignore the GND and VCC terminals. Once the ends of the twisted pair cable have been terminated, plug the IP67 connector into the inverter, and the RS485 converter to your PC's serial port. Inverter Com port note: The inverter's communications port is electrically isolated from the PV input and AC grid. It is essentially floating, and can be directly connected to a computer without fear of earth loops or dangerous voltages. Pictures note: The pictures show a different type of cable. Cat5 was not used at the time. However it is still twisted along its length. |
     |
|
5. Set up the com port Under Device Manager, open the Properties of the com port to be used. Go to the Port Settings tab and ensure the defaults are set (Bits per second=9600, Data bits=8 , Parity=none, Stop bits=1, Flow control=none. |
 |
|
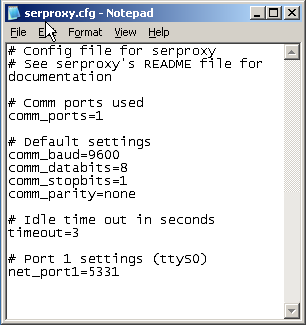
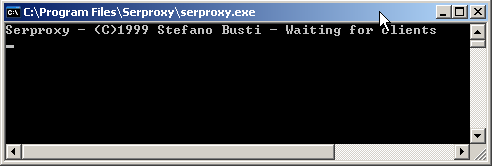
6. Configure Serproxy Download serproxy and extract it to a suitable location. You should have at least a serproxy.exe and a serproxy.cfg file. It is recommeded that you create a serproxy folder in c:Program Files to sore these files. Open the serproxy.cfg file in notepad. Under comm_ports, remove all except for 1 (if you're using com1. Pick another port if com1 is already in use). Leave the default settings as they are: comm_baud=9600 Set the idle timeout to 3 seconds. If the inverter doesn't respond (e.g. gone to sleep overnight), it won't delay the PHP script excessively. Under port settings, leave only port 1. Delete all the others, leaving: # Port 1 settings (ttyS0) Once you're done, save and close the file. Run serproxy.exe and leave the window open. Downloads |
|
|
7. Set up the PHP scripts Open the aerosharp_php.zip file and extract the aerosharp.php script to your webserver's folder where web documents are served. By default, the script is set up to use localhost and port 5331 to access serproxy. If your configuration is different, change the corresponding settings under the get_aerosharp_status_from_port() function. |
|
|
8. Test your configuration. Test SerProxy by telnetting into it (i.e. telnet localhost 5331). If activity appears in the serproxy window, it has been set up correctly. At this point, ensure your inverter is running. Next, execute the PHP script by loading it in your browser (e.g. http://localhost/aerosharp.php). The URL depends on how your web server is set up and where you saved the script to. If all is well, you should see the inverter stats listed in a table. If no data is received, or the data looks wrong, try reversing the polarity of the RS485 wiring on one end of the cable. Check the continuity of your wiring. If you're using a 3-pin connector, make sure you have used the correct pins. |
 |
|
9. Use or improve it. If you're happy to just be able to view the inverter status on your computer, you can stop here. If you have your router and port forwarding set up for your web server, you can view the inverter status page on your smart phone or tablet from anywhere in the world. If you're a PHP and MySQL developer, you may want to expand upon this simple script, adding logging and graphing capabilities. The inverter's data is updated internally every two seconds. A script could be set up so that the inverter's return string is stored in a database every couple of seconds for analysis or graphing later. The com port computer running serproxy doesn't necessarily need to be the one running the web server as well. You can put the PHP script on another web server, and change the IP address or hostname in the script so it connects to a remote computer running serproxy (the one connected to the inverter's RS485 port). |
 |

Notes and errata:
- Sending an incorrect data string to the inverter can cause its com port to lock up. If this happens, the inverter will need to be power cycled (i.e. disconnect grid, disconnect PV, wait one minute, re-connect PV, re-connect grid). This shouldn't be a problem unless you're experimenting with sending other commands to the inverter.
- Sending the string AA0502000000020000 to the inverter's Com port will cause it to return status data.
- PV2 voltage and current are not displayed on the web page, although the analyser function does gather this data. It is not displayed because my inverter only has one PV input. It is a simple task to add some HTML to show the missing entries.
- At the moment, the PV current (amps) is not being returned from the inverter (HR-INV-X01-015). If anybody knows why this is the case, or how to fix it, please let us know.
- If you're running the monitor script on an HP ProLiant server with iLO, the Com port may stop working if a certain string sequence of data is returned from the inverter. HP released an advisory note that addresses this issue. Prior to resolving the issue, my server's Com port stopped working several times a day due to certain data sequences from the inverter.
- The inverter status modes that I can extract from the output string are: Stand by, Grid Volt Error and Maximum Power Point. These are derived from bytes 19 and 20. If anyone knows of more, let us know.
- For continued, prolonged use, serproxy should be run as a service. This eliminates the need to keep the serproxy window open, and it will start automatically with the system. Running serproxy as a service can be achieved using srvany.exe, part of the Windows 2003 Server Resource Kit Tools.
- This script only works with the older batch of Aero-Sharp inverters. Check the version on the back of your LCD board. If it is version 2.0 or above, it may not work. Recent units manufactured after 2010 may need a firmware downgrade before the com port is responsive.
Ray, Mon, 02 Jul 2012 02:50 pm: Reply
Jaans, Thu, 19 Jul 2012 02:31 pm: Reply
david, Sat, 04 Aug 2012 01:32 pm: Reply
Steve, Fri, 31 Aug 2012 10:38 am: Reply
Skweekah, Thu, 18 Apr 2013 10:48 am: Reply
phred01, Sun, 14 Jul 2013 09:45 am: Reply
jim, Tue, 14 Apr 2015 03:51 am: Reply
Matt, Fri, 15 Jan 2016 03:37 am: Reply
Charlie, Sat, 29 Apr 2017 05:17 pm: Reply